降噪及opencv图像处理

前言

前些天帮一个学长做图像降噪,首先想到的是利用MPI和中值滤波对图像进行处理(因为之前在github上闲逛的时候貌似见过这东西)。
然而这种方法效果并不好,还有和很多限制(比如只能处理pgm灰度图),所以就往opencv的方向考虑了。

MPI及中值滤波

这种方法相对简单,完整的代码点击展开
1
2
3
4
5
6
7
8
9
10
11
12
13
14
15
16
17
18
19
20
21
22
23
24
25
26
27
28
29
30
31
32
33
34
35
36
37
38
39
40
41
42
43
44
45
46
47
48
49
50
51
52
53
54
55
56
57
58
59
60
61
62
63
64
65
66
67
68
69
70
71
72
73
74
75
76
77
78
79
80
81
82
83
84
85
86
87
88
89
90
91
92
93
94
95
96
97
98
99
100
101
102
103
104
105
106
107
108
109
110
111
112
113
114
115
116
117
118
119
120
#include <iostream>
#include <vector>
#include <algorithm>
#include <mpi.h>

const int WIDTH = 512;
const int HEIGHT = 512;

// 中值滤波函数
void medianFilter(const std::vector<int>& input, std::vector<int>& output, int width, int height) {
// 处理除边界的每一个像素
for (int y = 1; y < height - 1; ++y) {
for (int x = 1; x < width - 1; ++x) {
std::vector<int> neighbors;
// 收集3x3邻域内的像素值
for (int j = -1; j <= 1; ++j) {
for (int i = -1; i <= 1; ++i) {
neighbors.push_back(input[(y + j) * width + (x + i)]);
}
}
// 对邻域内像素值进行排序
std::sort(neighbors.begin(), neighbors.end());
// 选取中值作为输出像素值
output[y * width + x] = neighbors[4];
}
}
}

// 加载图像
std::vector<int> loadPGM(const std::string& filename, int& width, int& height) {
std::ifstream file(filename);
std::string line;
std::getline(file, line);
file >> width >> height;
int max_val;
file >> max_val; // 读取最大灰度值
std::vector<int> image(width * height);
for (int i = 0; i < width * height; ++i) {
file >> image[i];
}
return image;
}

// 保存图像
void savePGM(const std::string& filename, const std::vector<int>& image, int width, int height) {
std::ofstream file(filename);
file << "P2\n";
file << "# Filtered Image\n";
file << width << " " << height << "\n";
file << "255\n"; // 最大灰度值
for (int y = 0; y < height; ++y) {
for (int x = 0; x < width; ++x) {
file << image[y * width + x] << " ";
}
file << "\n";
}
}

int main(int argc, char** argv) {
MPI_Init(&argc, &argv);

int rank, size;
MPI_Comm_rank(MPI_COMM_WORLD, &rank);
MPI_Comm_size(MPI_COMM_WORLD, &size);

int rows_per_process = HEIGHT / size;
int start_row = rank * rows_per_process;
int end_row = (rank == size - 1) ? HEIGHT : start_row + rows_per_process;

// 加载输入图像
std::vector<int> image;
int input_width, input_height;
if (rank == 0) {
// 主进程负责加载图像
image = loadPGM("input.pgm", input_width, input_height);
}

//MPI 广播图像尺寸信息
MPI_Bcast(&input_width, 1, MPI_INT, 0, MPI_COMM_WORLD);
MPI_Bcast(&input_height, 1, MPI_INT, 0, MPI_COMM_WORLD);

// 分发图像数据
if (rank == 0) {
// 主进程分发图像数据给各个进程
for (int dest = 1; dest < size; ++dest) {
int dest_start_row = dest * rows_per_process;
int dest_end_row = (dest == size - 1) ? HEIGHT : dest_start_row + rows_per_process;
MPI_Send(&image[dest_start_row * input_width], (dest_end_row - dest_start_row) * input_width, MPI_INT, dest, 0, MPI_COMM_WORLD);
}
} else {
// 其他进程接收分配的图像数据
image.resize((end_row - start_row) * input_width);
MPI_Recv(&image[0], (end_row - start_row) * input_width, MPI_INT, 0, 0, MPI_COMM_WORLD, MPI_STATUS_IGNORE);
}

// 每个进程单独处理
std::vector<int> filteredImage((end_row - start_row) * input_width);
medianFilter(image, filteredImage, input_width, end_row - start_row);

// 收集处理结果到主进程
if (rank != 0) {
MPI_Send(&filteredImage[0], filteredImage.size(), MPI_INT, 0, 0, MPI_COMM_WORLD);
} else {
std::vector<int> result(input_width * input_height);
std::copy(filteredImage.begin(), filteredImage.end(), result.begin());
for (int source = 1; source < size; ++source) {
int source_start_row = source * rows_per_process;
int source_end_row = (source == size - 1) ? HEIGHT : source_start_row + rows_per_process;
MPI_Recv(&result[source_start_row * input_width], (source_end_row - source_start_row) * input_width, MPI_INT, source, 0, MPI_COMM_WORLD, MPI_STATUS_IGNORE);
}

// 保存输出图像
savePGM("output.pgm", result, input_width, input_height);
}

MPI_Finalize();

return 0;
}

如果没有安装mpi库,可以把下面的精简版库文件直接导入进项目里:

1
2
3
4
5
6
7
8
9
10
11
12
13
14
15
16
17
18
19
20
21
22
23
24
25
26
27
28
29
30
31
32
33
34
35
36
37
38
39
40
41
42
43
44
45
46
47
48
49
50
51
52
53
54
55
56
57
58
59
60
61
62
63
#ifndef MPI_H_INCLUDED
#define MPI_H_INCLUDED

// MPI 数据类型
typedef int MPI_Datatype;
typedef int MPI_Comm;
typedef int MPI_Request;

// MPI 状态类型
typedef struct MPI_Status {
int MPI_SOURCE;
int MPI_TAG;
int MPI_ERROR;
} MPI_Status;

// MPI 操作类型
typedef enum {
MPI_MAX,
MPI_MIN,
MPI_SUM,
MPI_PROD,
MPI_LAND,
MPI_BAND,
MPI_LOR,
MPI_BOR,
MPI_LXOR,
MPI_BXOR,
MPI_MAXLOC,
MPI_MINLOC,
MPI_REPLACE
} MPI_Op;

// MPI 进程管理函数
int MPI_Init(int *argc, char ***argv);
int MPI_Finalize(void);
int MPI_Abort(MPI_Comm comm, int errorcode);
double MPI_Wtime(void);
double MPI_Wtick(void);

// MPI 点对点通信函数
int MPI_Send(const void *buf, int count, MPI_Datatype datatype, int dest, int tag, MPI_Comm comm);
int MPI_Recv(void *buf, int count, MPI_Datatype datatype, int source, int tag, MPI_Comm comm, MPI_Status *status);

// MPI 非阻塞通信函数
int MPI_Isend(const void *buf, int count, MPI_Datatype datatype, int dest, int tag, MPI_Comm comm, MPI_Request *request);
int MPI_Irecv(void *buf, int count, MPI_Datatype datatype, int source, int tag, MPI_Comm comm, MPI_Request *request);
int MPI_Wait(MPI_Request *request, MPI_Status *status);
int MPI_Waitany(int count, MPI_Request array_of_requests[], int *index, MPI_Status *status);

// MPI 集体通信函数
int MPI_Bcast(void *buf, int count, MPI_Datatype datatype, int root, MPI_Comm comm);
int MPI_Reduce(const void *sendbuf, void *recvbuf, int count, MPI_Datatype datatype, MPI_Op op, int root, MPI_Comm comm);
int MPI_Allreduce(const void *sendbuf, void *recvbuf, int count, MPI_Datatype datatype, MPI_Op op, MPI_Comm comm);
int MPI_Scatter(const void *sendbuf, int sendcount, MPI_Datatype sendtype, void *recvbuf, int recvcount, MPI_Datatype recvtype, int root, MPI_Comm comm);
int MPI_Gather(const void *sendbuf, int sendcount, MPI_Datatype sendtype, void *recvbuf, int recvcount, MPI_Datatype recvtype, int root, MPI_Comm comm);
int MPI_Allgather(const void *sendbuf, int sendcount, MPI_Datatype sendtype, void *recvbuf, int recvcount, MPI_Datatype recvtype, MPI_Comm comm);
int MPI_Barrier(MPI_Comm comm);

// MPI 其他函数和常量
#define MPI_COMM_WORLD ((MPI_Comm)0x44000000)
#define MPI_STATUS_IGNORE ((MPI_Status *) MPI_STATUS_IGNORE)

#endif /* MPI_H_INCLUDED */

当然,不用MPI直接中值滤波也行:

1
2
3
4
5
6
7
8
9
10
11
12
13
14
15
16
17
18
19
20
21
22
23
24
25
26
27
28
29
30
31
32
33
34
35
36
37
38
39
40
41
42
43
44
45
46
47
48
49
50
51
52
53
54
55
56
57
58
59
60
61
62
63
64
65
66
67
68
69
70
71
72
73
74
75
76
77
#include <iostream>
#include <vector>
#include <algorithm>
#include <fstream>
#include <sstream>

const int WIDTH = 512;
const int HEIGHT = 512;

// 中值滤波函数
void medianFilter(const std::vector<int>& input, std::vector<int>& output, int width, int height) {
// 处理除了边界的每一个像素
for (int y = 1; y < height - 1; ++y) {
for (int x = 1; x < width - 1; ++x) {
std::vector<int> neighbors;
// 收集3x3邻域内的像素值
for (int j = -1; j <= 1; ++j) {
for (int i = -1; i <= 1; ++i) {
neighbors.push_back(input[(y + j) * width + (x + i)]);
}
}
// 对邻域内像素值进行排序
std::sort(neighbors.begin(), neighbors.end());
// 选取中值作为输出像素值
output[y * width + x] = neighbors[4];
}
}
}

// 加载PGM格式的图像文件
std::vector<int> loadPGM(const std::string& filename, int& width, int& height) {
std::ifstream file(filename);
std::string line;
std::getline(file, line);
file >> width >> height;
int max_val;
file >> max_val; // 读取最大灰度值
std::vector<int> image(width * height);
for (int i = 0; i < width * height; ++i) {
file >> image[i]; // 读取像素值
}
return image;
}

// 保存PGM格式的图像文件
void savePGM(const std::string& filename, const std::vector<int>& image, int width, int height) {
std::ofstream file(filename);
file << "P2\n";
file << "# Filtered Image\n";
file << width << " " << height << "\n";
file << "255\n"; // 最大灰度值
for (int y = 0; y < height; ++y) {
for (int x = 0; x < width; ++x) {
file << image[y * width + x] << " ";
}
file << "\n";
}
}

int main() {
// 加载输入图像
std::string input_filename = "input.pgm";
int input_width, input_height;
std::vector<int> input_image = loadPGM(input_filename, input_width, input_height);
std::vector<int> output_image(input_width * input_height);
// 对图像进行中值滤波
medianFilter(input_image, output_image, input_width, input_height);

// 保存处理后的图像
std::string output_filename = "output.pgm";
savePGM(output_filename, output_image, input_width, input_height);

std::cout << "已完成,输出保存为 " << output_filename << std::endl;

return 0;
}

这种方法的效果图找不到了,我们只需要要知道,这样的处理效果远不及预期就对了。

Opencv

OpenCV是一个基于Apache2.0许可(开源)发行的跨平台计算机视觉和机器学习软件库,轻量、高效,总之就是肥肠的好用。

人家的官网

安装opencv

在官网上下载opencv最新的windows发行版下载exe文件。很不幸的是,它的发行版是在github上的,如果下载的太慢,可以用我上传到onedrive上的发行版(github源文件,无任何修改)。我的onedrive分享
下载完可以验证一下哈希值bff38466091c313dac21a0b73eea8278316a89c1d434c6f0b10697e087670168。然后直接安装就行。

配置环境变量

点击展开

打开系统信息,找到高级系统设置

点击环境变量

系统变量里选中path,点击编辑

选择新建

然后到刚刚opencv的安装目录,找到\bin文件夹,注意有两个bin文件夹,不要搞错。例如:我将opencv安装在了E盘的名为opencv的文件夹里,那么正确的bin文件夹地址应该是E:\opencv\opencv\build\x64\vc16\bin。将这个地址填进刚刚新建的环境变量里,确定即可。

最后检验是否安装成功:
在cmd里输入opencv_version,若输出为版本号,即安装成功。

1
2
C:\Users\33167>opencv_version
4.10.0

Visual Studio里相关配置

点击展开

新建一个需要使用opencv的项目,假如名为opencv。在顶上项目中找到opencv属性

选择vc++目录,注意,请确保此时上面两栏分别为releasex64

选择编辑

右上角文件夹一样的图标可以新增行数,在新增的行里像我这样填就可以,只需要把我的E:\opencv换成自己的安装目录就行:

库目录同理:

最后,在链接器-输入-附加依赖项里加入如图的东西就大功告成

最后,请确保在项目运行和调试时。顶部始终是releasex64

可以写一个简单的项目检验opencv是否正常运作:

1
2
3
4
5
6
7
8
9
10
11
12
13
14
15
16
17
18
#include <opencv2/opencv.hpp>
#include <iostream>

int main() {
// 读取图像
cv::Mat image = cv::imread("这里请填一张图片的地址,注意要用双斜杠", cv::IMREAD_COLOR);
// 检查图像是否成功加载
if (image.empty()) {
std::cerr << "无法读取图像文件" << std::endl;
return 1;
}
// 在窗口中显示图像
cv::imshow("Image", image);
cv::waitKey(0);
cv::destroyAllWindows();

return 0;
}

这个代码的作用是显示一张图像。

opencv图像降噪

opencv高斯模糊

这应该是最简单暴力的降噪方式了……

1
2
3
4
5
6
7
8
9
10
11
12
13
14
15
16
17
18
19
20
21
22
23
24
25
26
27
28
29
#include <opencv2/opencv.hpp>
#include <iostream>

int main() {
// 读取输入图像
std::string input_filename = "input.jpg"; // 图像文件地址
cv::Mat input_image = cv::imread(input_filename, cv::IMREAD_COLOR);
if (input_image.empty()) {
std::cerr << "无法读取输入图像: " << input_filename << std::endl;
return 1;
}

cv::Mat output_image;

// 应用高斯模糊
cv::GaussianBlur(input_image, output_image, cv::Size(5, 5), 0); // 使用5x5的高斯核

// 保存处理后的图像
std::string output_filename = "output.jpg"; // 输出图像文件名
bool success = cv::imwrite(output_filename, output_image);
if (!success) {
std::cerr << "无法保存输出图像: " << output_filename << std::endl;
return 1;
}

std::cout << "图像降噪已完成,输出保存为 " << output_filename << std::endl;

return 0;
}

非常的简单,核心部分就是应用高斯模糊的部分:

1
cv::GaussianBlur(input_image, output_image, cv::Size(5, 5), 0);
点击展开效果图

为了让效果更加明显,可以增大高斯核,从原来的5x5改成25x25:

1
cv::GaussianBlur(input_image, output_image, cv::Size(25, 25), 0);
点击展开效果图

高斯模糊虽然能有效的降低图像的噪点,但会抹去大量的原图细节。
如果要做到平衡降噪和图片清晰度,单纯的高斯模糊显然不是最优解。

opencv中值滤波

依旧是中值滤波,只不过这次换成了通过opencv来进行这个操作而已。

1
2
3
4
5
6
7
8
9
10
11
12
13
14
15
16
17
18
19
20
21
22
23
24
25
26
27
28
29
30
31
32
33
34
35
36
37
#include <iostream>
#include <opencv2/opencv.hpp>

// opencv中值滤波函数
void medianFilter(cv::Mat& input, cv::Mat& output) {
for (int c = 0; c < input.channels(); ++c) {
cv::medianBlur(input, output, 3); // 使用3x3的中值滤波
}
}

int main() {
// 输入图像
std::string input_filename = "input.jpg";
cv::Mat input_image = cv::imread(input_filename, cv::IMREAD_COLOR);
if (input_image.empty()) {
std::cerr << "无法加载输入图像: " << input_filename << std::endl;
return 1;
}


cv::Mat output_image;

// 对图像进行中值滤波
medianFilter(input_image, output_image);

// 保存处理后的图像
std::string output_filename = "output.jpg";
bool success = cv::imwrite(output_filename, output_image);
if (!success) {
std::cerr << "无法保存输出图像: " << output_filename << std::endl;
return 1;
}

std::cout << "中值滤波已完成,输出保存为 " << output_filename << std::endl;

return 0;
}

其中的核心是cv中值滤波函数

1
2
3
4
5
void medianFilter(cv::Mat& input, cv::Mat& output) {
for (int c = 0; c < input.channels(); ++c) {
cv::medianBlur(input, output, 3); // 使用3x3的中值滤波
}
}
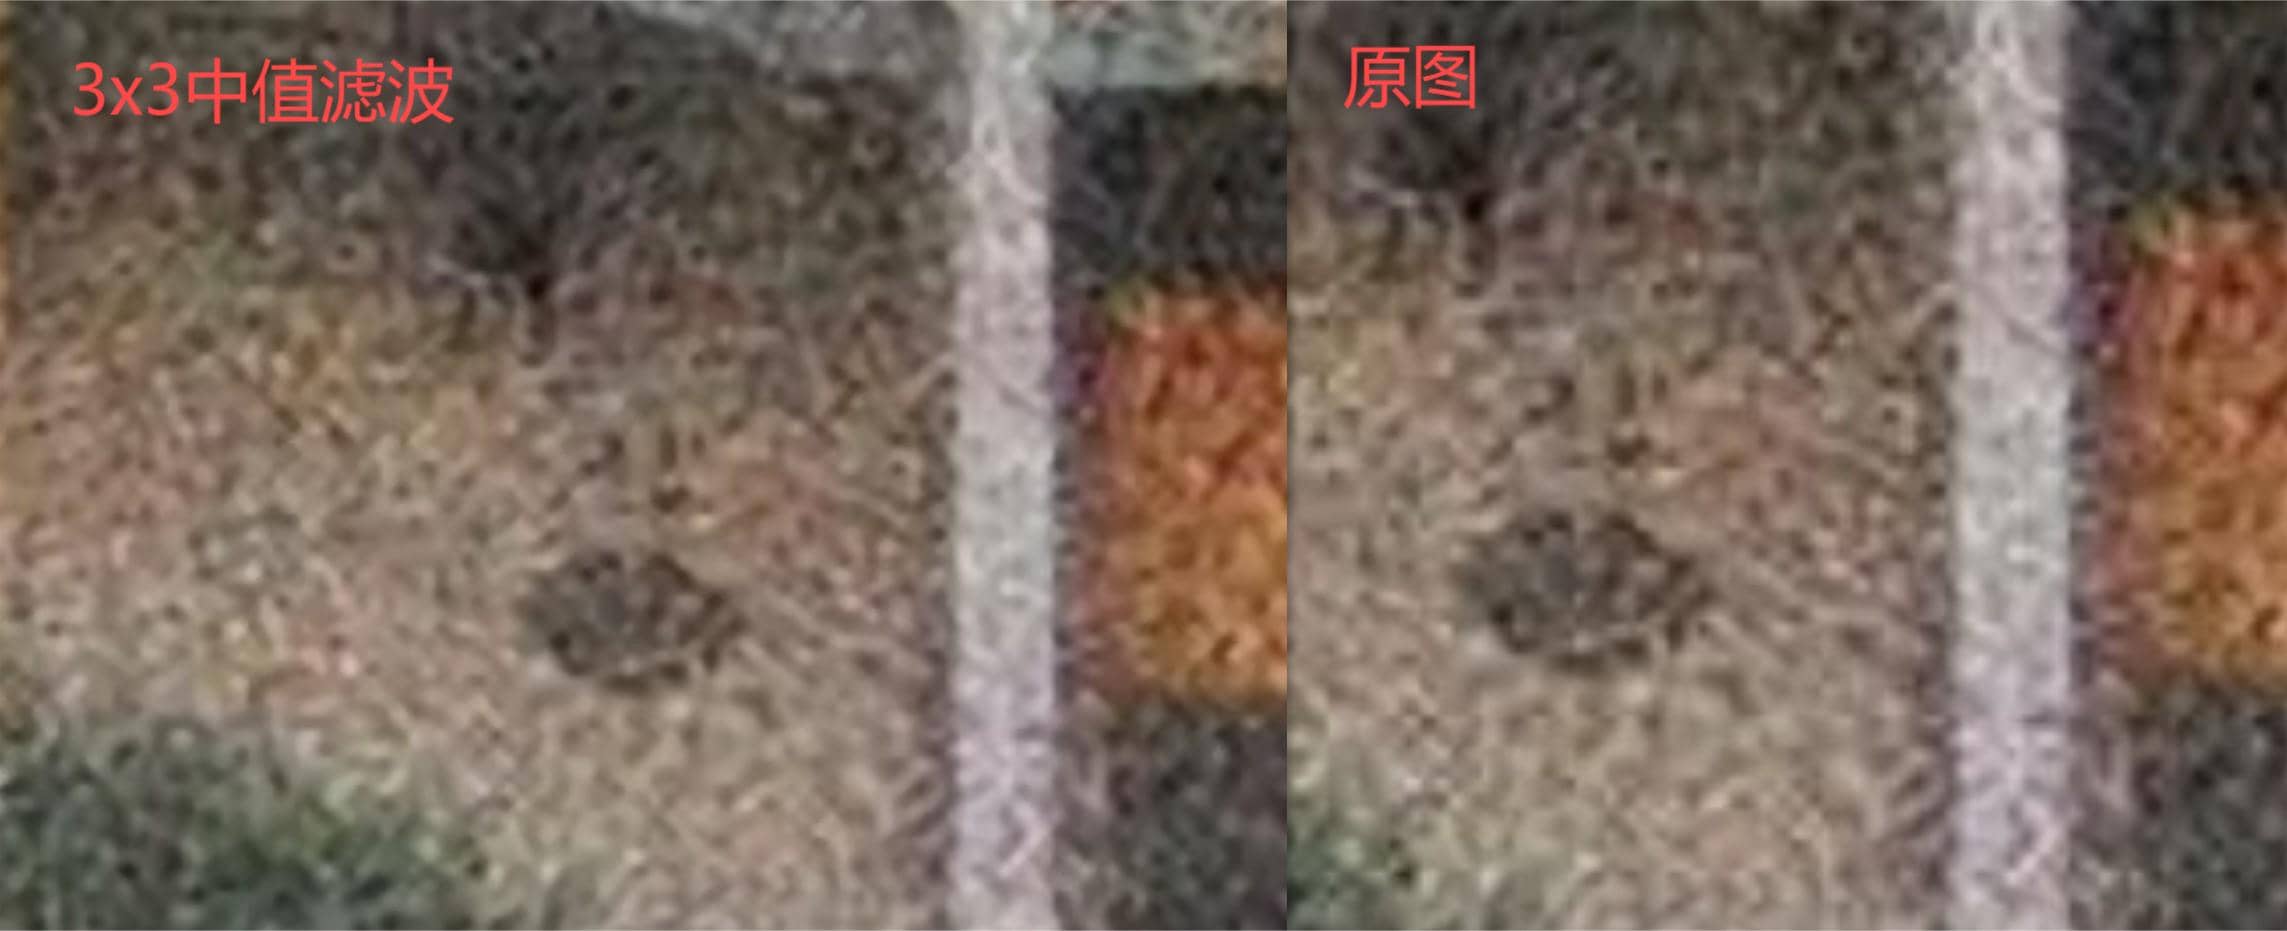
点击展开效果图
可以发现,3x3的中值滤波和原图几乎没有区别,将其改成9x9的中值滤波效果更加明显:

中值滤波总体而言表现还不错。

opencv双边滤波

……懒得放图了,反正这个效果是最好的。

基于opencv的运动检测

代码如下:

1
2
3
4
5
6
7
8
9
10
11
12
13
14
15
16
17
18
19
20
21
22
23
24
25
26
27
28
29
30
31
32
33
34
35
36
37
38
39
40
41
42
43
44
45
46
47
48
49
50
51
52
53
54
55
56
57
58
59
60
61
62
63
64
65
66
67
68
69
70
71
72
73
74
75
76
77
78
79
80
81
82
83
84
85
86
87
88
89
90
91
92
93
94
95
96
#include <opencv2/opencv.hpp>
#include <iostream>
#include <cmath>

using namespace cv;
using namespace std;

float distance(Point2f pt1, Point2f pt2) {
return sqrt(pow(pt1.x - pt2.x, 2) + pow(pt1.y - pt2.y, 2));
}

int main() {
// 初始化摄像头
VideoCapture cap(0);
if (!cap.isOpened()) {
cerr << "Error opening video stream or file" << endl;
return -1;
}

Mat background, gray, diff, thresholded, dilated;
cap >> background;
cvtColor(background, background, COLOR_BGR2GRAY);
GaussianBlur(background, background, Size(5, 5), 0);

vector<Point2f> prevCenters;

while (true) {
Mat frame;
cap >> frame;
if (frame.empty())
break;

cvtColor(frame, gray, COLOR_BGR2GRAY);
GaussianBlur(gray, gray, Size(5, 5), 0);

// 计算当前帧与背景帧的差异
absdiff(gray, background, diff);
threshold(diff, thresholded, 30, 255, THRESH_BINARY);

dilate(thresholded, dilated, Mat(), Point(-1, -1), 2);


vector<vector<Point>> contours;
findContours(dilated, contours, RETR_EXTERNAL, CHAIN_APPROX_SIMPLE);


Mat contoursFrame = Mat::zeros(frame.size(), CV_8UC3);

for (size_t i = 0; i < contours.size(); i++) {
if (contourArea(contours[i]) < 1000) // 过滤掉小的轮廓区域
continue;


Moments mu = moments(contours[i]);
Point2f center(mu.m10 / mu.m00, mu.m01 / mu.m00);


drawContours(contoursFrame, contours, static_cast<int>(i), Scalar(255, 255, 255), FILLED);


float speed = 0.0;
if (!prevCenters.empty()) {
Point2f prevCenter = prevCenters[i];
float dist = distance(center, prevCenter);
speed = dist * 30;
}

// 在原始帧上显示速度
string text = "Speed: " + to_string(speed) + " px/s";
Point textOrg(center.x + 10, center.y);
putText(frame, text, textOrg, FONT_HERSHEY_SIMPLEX, 0.5, Scalar(255, 0, 0), 2);


if (i < prevCenters.size())
prevCenters[i] = center;
else
prevCenters.push_back(center);
}

// 显示原始帧和单独的轮廓帧
imshow("Motion Detection", frame);
imshow("Contours", contoursFrame);

background = gray.clone();

// 检测键盘输入,按'q'键退出循环
if (waitKey(1) == 'q')
break;
}


cap.release();
destroyAllWindows();

return 0;
}

上述代码实现了简单的运动检测功能,能将运动物体的轮廓在另一个窗口中显示出来。
其中VideoCapture cap(0);调用的是电脑自带的默认摄像头,如果希望使用usb摄像头,可以改为VideoCapture cap(1)或者VideoCapture cap(2).